Denon internet radios use the radiodenon.com web management portal to manually add Calm Radio’s custom radio station URLs. This is how you can add our Calm Radio's custom HD sound-quality member URLs to show up on your radio’s INTERNET RADIO menu, which will then synchronize automatically with your radiodenon.com account.
Setup Instructions
Step 1
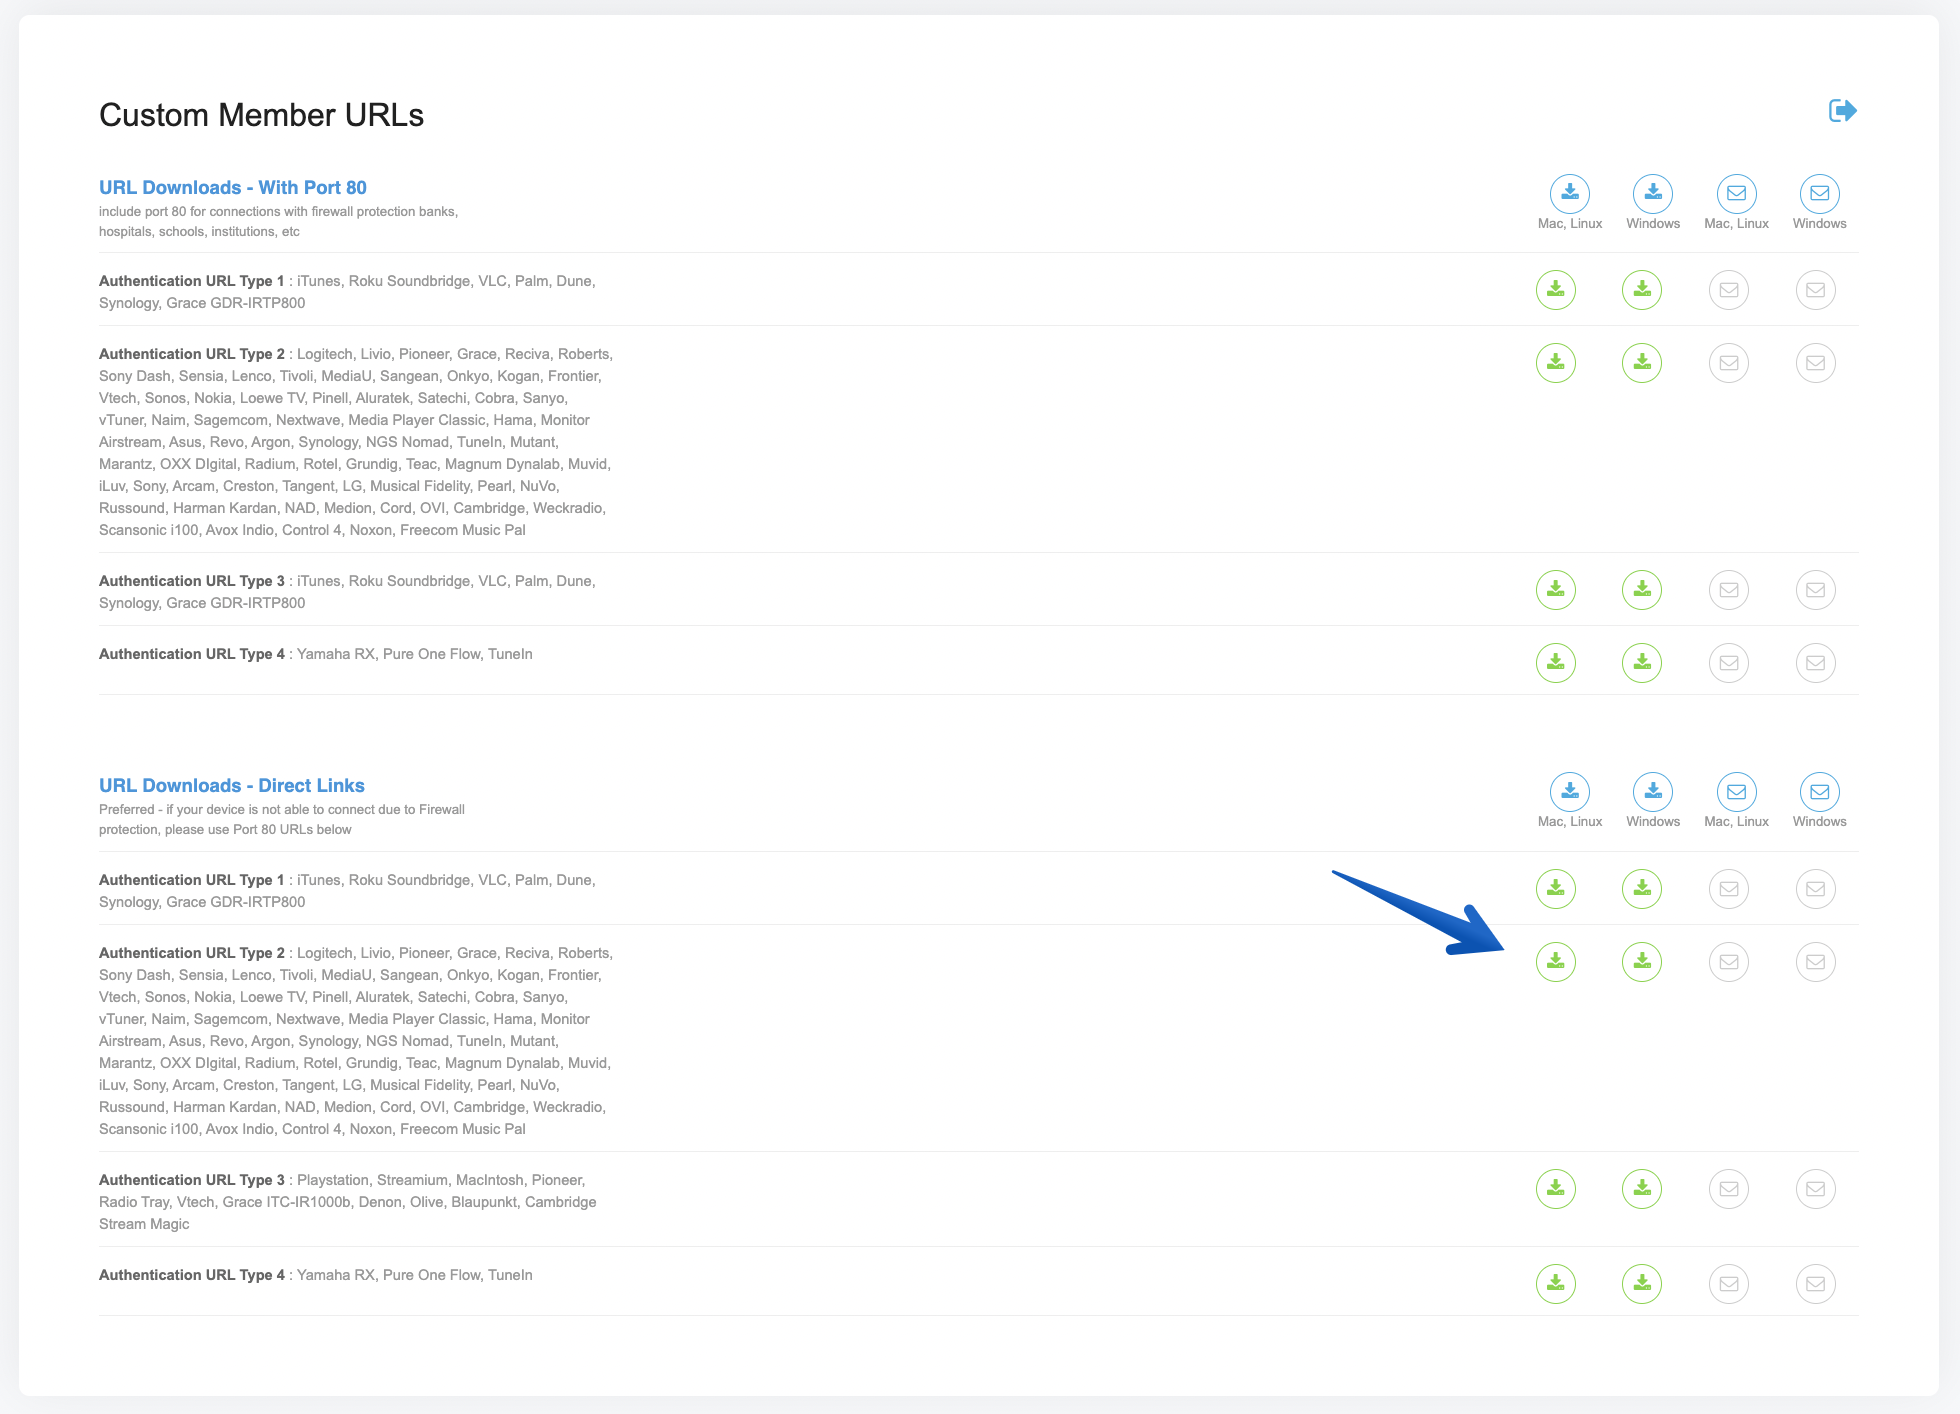
- Visit the My Account menu on the CalmRadio.com website.
- Choose "My Internet Radio URLs" from the bottom of the page.
- Select "View Full Table."
- Choose either "Direct Links" (preferred) or "With Port 80" Authentication URL Type 2.
- Download or email the URLs you will need to enter into the MY ADDED STATIONS menu of your radiodenon.com account.
Step 2
- Next, you need to register for an account at radiodenon.com
- You will need to add your custom Calm Radio URLs to the radiodenon.com website either your device’s MAC address, or a registration code. Please check your internet radio's user manual.
Step 3
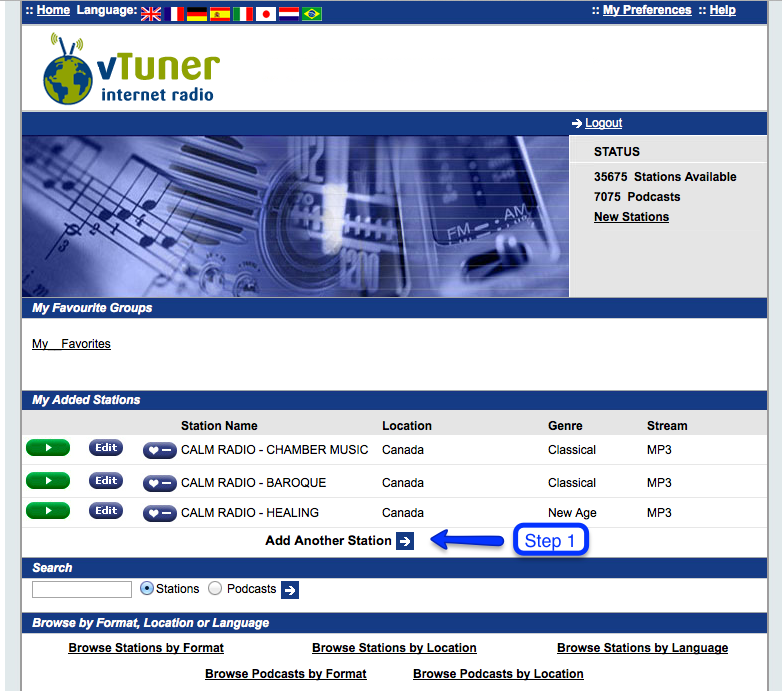
- On the vTuner website, look for the "My Added Stations" menu.
- Click "Add Another Station" to create a new station entry.
Step 4
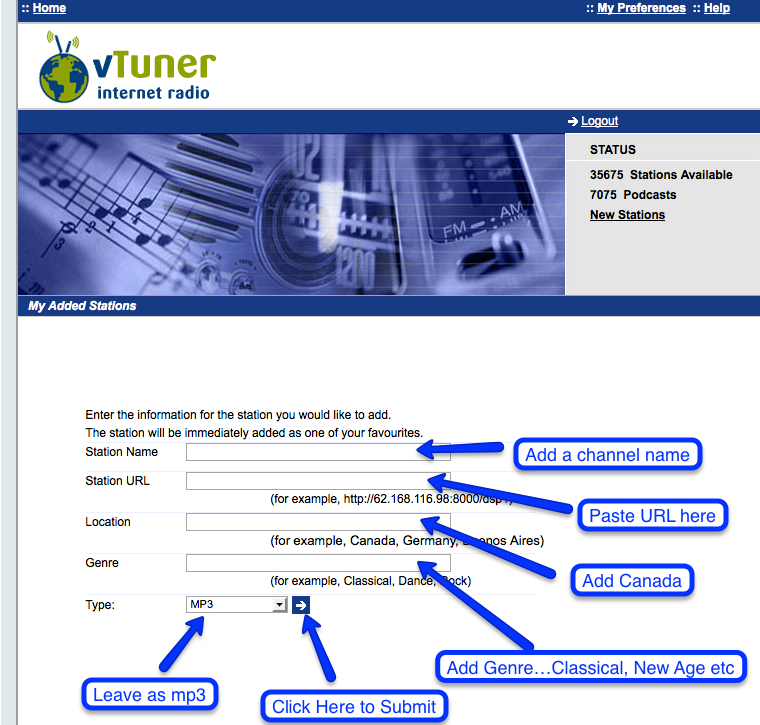
- In Box 1, Add a Station Name like "CALM RADIO - Solo Piano"
- In Box 2, carefully copy any Calm Radio custom URLs you downloaded or had emailed into Box 2. You can use a High Medium or Low URL. High will require excellent high-speed internet bandwidth.
- In Box 3 add Canada for the Location
- In Box 4 add the genre, i.e...Classical, New Age, Atmosphere, Relaxation...
- Next line should be MP3
- Click the arrow to accept your entry
Step 5
- On your internet radio, select or press the "Network" menu Then select or press the Internet Radio menu PLEASE NOTE: If the Internet Radio menu is already playing, hit the "Back" button
- Select the Added Stations menu. Your new Calm Radio channel will show up there.
Step 6
Finding your MAC Address
[The Ethernet only upgraded user of AVR-5805, AVC-A1XV, AVR-4806, AVC-A11XV]
When you made the upgrade order sheet, you got the MAC address of your product using the "Get MAC address and Order" application. Please use that MAC address. If you forgot this, please run the "Get MAC address and Order" application again. (Only to get MAC address. To reorder is not necessary.).
[The Video upgraded user of AVR-5805, AVC-A1XV, AVR-4806, AVC-A11XV or AVR-4306, AVC-4320]
- Push the "SYSTEM SETUP" button
- Select the "Network Setup"
- Select the "Network Option"
- OSD shows the MAC Address
[CHR-F103]
- Push the "SETUP" button
- Select the "Network setting"
- Select the "IP Address"
- Down the cursor
- Display Shows the MAC Address
[AVP-A1HD,AVR-5308,AVC-A1HD, AVR-4308,AVR-3808,AVC-3808,AVR-4310,AVR-3310,AVR-4810,AVR-991,AVR-3311,AVR-4311,AVR-A100]
- Push the "MENU" button
- Select the "MANUAL SETUP"
- Select the "NETWORK SETUP"
- Select the "Network Information"(AVR-3310,AVR-991,AVR-3311) or "Network Info"(other models)
- Display Shows the MAC Address
[S-302]
- Push the "HOME" button
- Select the "SETUP"
- Select the "NETWORK SETUP"
- Select the "Network Info"
- Display Shows the MAC Address
[S-52,S-32]
- Push the "SOURCE" button
- Select the "SETUP"
- Select the "Network Setting"
- Select the "Network Info"
- Display Shows the MAC Address
[ASD-3W,ASD-3N,ASD-51W,ASD-51N]
- Select the "Setup"
- Select the "Network"
- Select the "Network Info"
- Display Shows the MAC Address
[RCD-N7,DNP-720]
- Push the "SOURCE" button
- Select the "Menu"
- Select the "Network"
- Select the "Network Info"
- Display Shows the MAC Address
[AVR-1912,AVR-2312,AVR-3312]
- Push the "MENU" button
- Select the "SYSTEM SETUP"
- Select the "NETWORK SETUP"
- Select the "NETWORK INFO"
- Display Shows the MAC Address